

Why Revit and 3DS Max used as an asset for Architects?
The main reason is that 3DS Max is suitable for graphics, 3D Modeling, and animations. Therefore, it works very well as a rendering tool and can also create animations, visual effects for Product Design and Architectural models. Revit is software for BIM (building information modelling) with tools to create intelligent 3D models of buildings, which can be used to produce construction documentation. Both programs are often used within the same firm and even by the same practitioner.
3Ds Max and Revit are interoperable and can be used together, for example, to incorporate designs for Different Families created in 3Ds Max within a Revit project. Firms may use 3Ds Max on some projects or components of a design and use Revit to generate BIM deliverables and to enable collaboration with other design disciplines.
In this blog, we will explore the unique features of these two design solutions together with the advantages of each one of them.
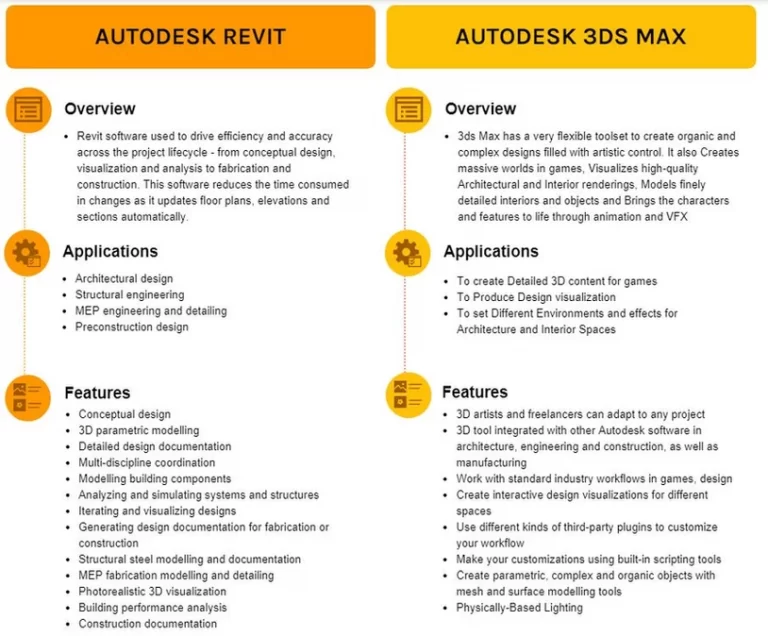
About Autodesk Revit and 3DS Max
Correlation between Revit and 3DS Max for Rendering
While customizing the naming standards, attributes can be reordered or new attributes can also be added according to the need and complexity of the project. These attributes are controlled by the character type and range, either it is just alphabets, numeric, or it is alphanumeric characters with a range limit, for example – defining a residential project name as an attribute with alphanumeric type and with the range of two to four characters, R001 (R###) will be the naming convention.DWhile working on a project, architects need renderings on different stages so they can check if a 3D model of the building is workable or not. Therefore, getting fast and high-quality renders is key to a productive, smooth and faster workflow. But the speed of render depends directly on the software 3D experts use.
We know Autodesk Revit can optimize and simplify the process making the workflow of projects very fast. There are top 5 reasons why you should try architectural 3D rendering in Revit.
Attributes Complying with ISO 19650
The attributes setting in ACC comply with the ISO 19650 set of standards. The attributes in the by-default applied naming convention include the detailed expansion too. For instance, when we add location as an attribute, the location value and its description adopted by the ISO 19650 are available with ACC as well. This detail provided by Autodesk Construction Cloud aids in saving time of referring and conforming to the original standards.
The information type and values in the attributes can be added, deleted, and modified according to the project requirements by the project admins. Only the project admins have full information settings control according to which all the stakeholders in the project perform.
1. Revit families makes the whole process easier and faster
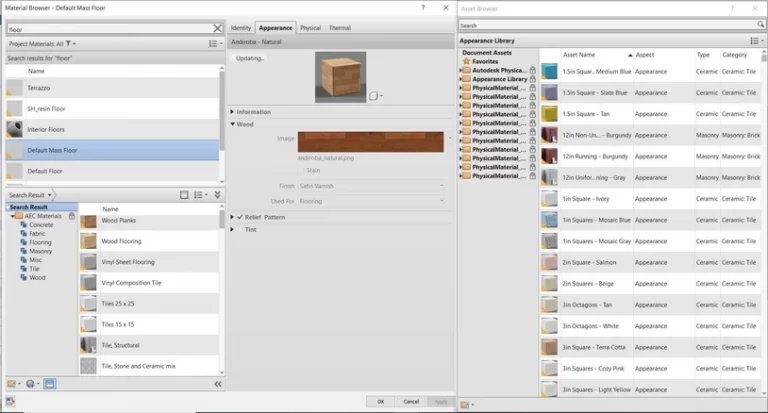
2. Revit has extensive libraries of material
3. Setting up camera’s for rendering is convenient in Revit
4. Revit has default render backdrops and light setting
5. Revit provide all types of rendering solutions for various purposes
Although we can create many renderings in Revit but doesn’t provide a professional platform like that modelled by 3DS Max. In Revit, we are likely to have issues with the depth of field, refraction, reflection, and exposure. The only way to make your 3D modelling better is by exporting your rendering to 3DS Max.
Some features make Autodesk 3ds Max apart from other software, making it a fun tool for architectural and interior design students to use in their spare time. For example, Renderings produced here are clean and precise and animated with highly quality texture-mapping, shading, light refraction, and motion blurs that correspond with the depth of field.
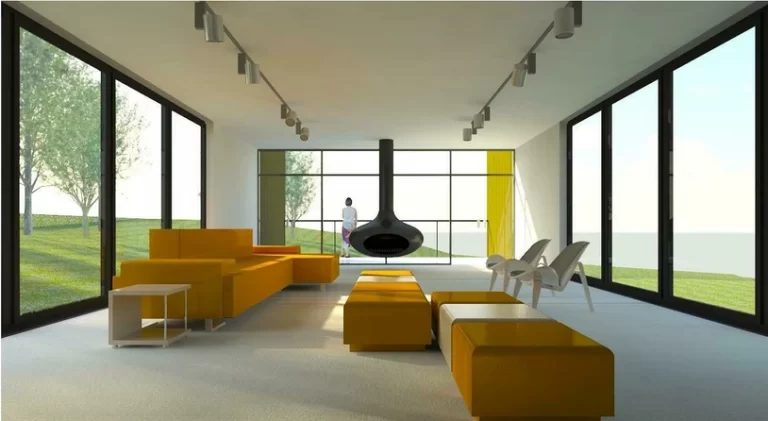
It means when you render an Interior space with 3ds Max. Its professional polish makes it look like an on-site photograph of the room.
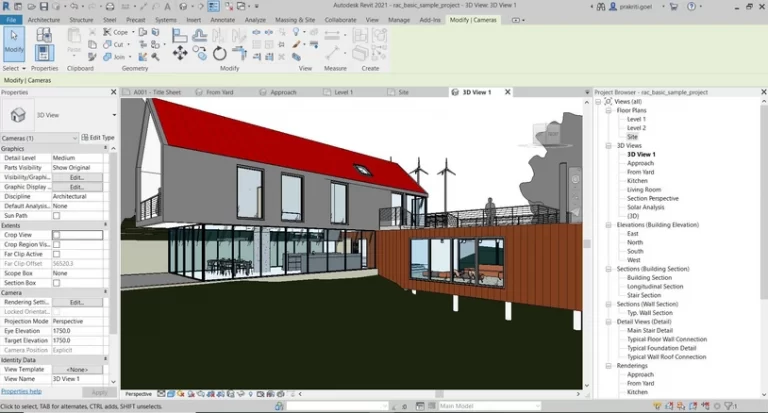
Courtesy to Autodesk
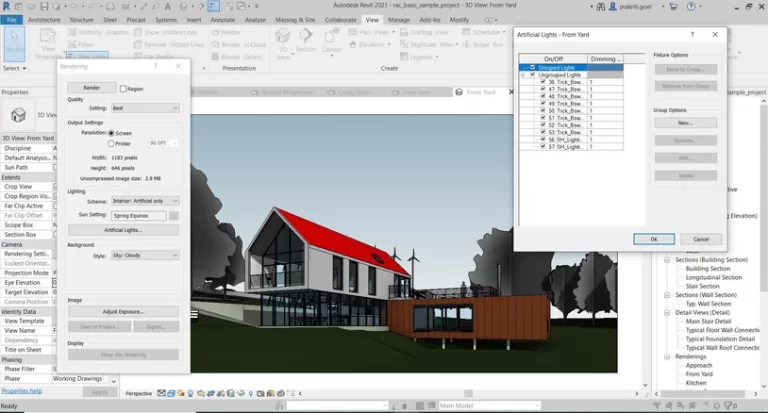
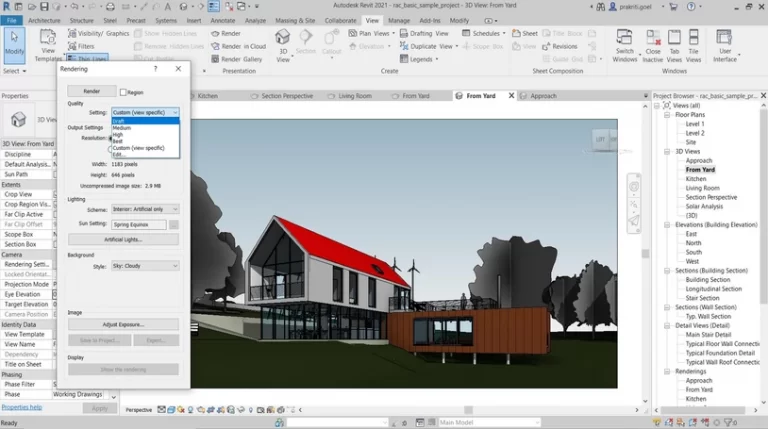
Rendering of a House Scene Using Autodesk Revit

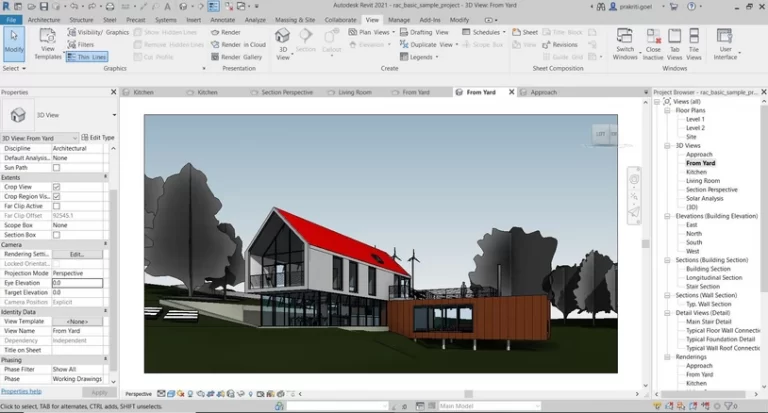
Courtesy to Autodesk
Rendering of a House Scene Using Autodesk 3Ds Max
When you are an architectural technician, realistic scenes will help you or your company pitch plans and ideas to your clients. They’ll make it easy for clients to imagine what your designs will look like once constructed in real life. Some clients may even put these renderings on display at the soon-to-be construction site to make people interested in the project at hand. Creating such renderings using architectural programs (like 3ds Max) will ensure that passers-by are impressed.
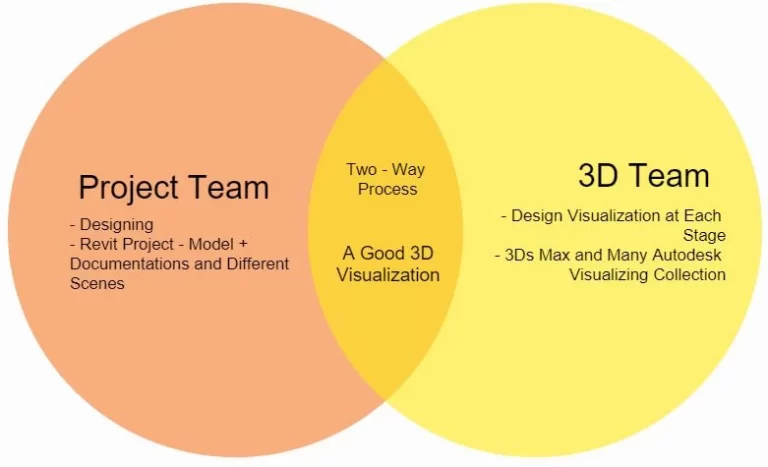
Workflow for Revit and 3D Max for Interative Design
Both projects and 3D visualization experts collaborate and complement each other to develop design iterations. The communication is two-directional as design decisions are evaluated with renderings and informed back to the Revit model. Once advanced 3D visualization software such as 3ds Max can connect to Revit models with a live link, a new venue is open for parallel and complimentary design support.
This workflow divided into two sections based on the tasks performed within each program: Modelling in Revit and Rendering in 3ds Max.
1. Modelling in Revit
The project team and the 3D Visualization team coordinate and work inside the Revit model to perform design options and set up the model to render correctly in 3ds Max. For allowing this collaborative process, some modelling guidelines are necessary to follow when using Revit that are: Organizing the Project Browser, Setting up of Project Location and True North, Checking off the Visibility Graphics for elements which can make the process of render slow, Creating multiple design options for the project.
2. Rendering in 3ds Max
When the Revit model linked in 3ds Max for further visualization, the Revit file can be updated automatically and generate progress renderings. It is also possible to edit design changes inside 3ds Max by applying mesh edits that can be evaluated and rendered in real-time through 3ds Max’s most advanced rendering technology.
3. From Progress to Final Rendering
The team then will create a presentation included tips and techniques to enhance the progress renderings into final design renderings for presentations so that the client can visualize the as-built model
Conclusion
Rendering in Revit is getting better every year but is not used as a substitute for professional rendering. Knowledge of exposure, reflection, refraction, depth of field is vital in achieving a quality result. Hardware limitations can also halt productivity on a workstation. As a result, it could take time to produce an image that is of a lower quality than those produced by a professional team.
When creating a Rendered image produced using Revit and 3ds Max, understanding the limitations and stages involved when creating the image can help create better results.
Also, in situations like, when a model is designed by an architectural firm and passes over to a 3D studio, it can reduce the cost of productivity, rendering time and help better coordination.